
Introduction to Baking
Baking is more than just following a recipe—it’s a blend of science, creativity, and a little bit of patience. Whether you’re just starting out or looking to brush up on your skills, understanding the basics is key to avoiding common baking mistakes and achieving delicious results every time. The right essential baking tools, like a reliable kitchen scale, measuring cups, and mixing bowls, can make all the difference when it comes to measuring ingredients accurately and ensuring your baked goods turn out as intended. Even the most experienced bakers encounter baking mistakes, but with a little knowledge and the right approach, you’ll be able to tackle any baking challenge with confidence. In this guide, we’ll walk you through the most common baking pitfalls and share practical tips to help you become a better baker, one batch at a time.
Why Your Bakes Keep Failing
Picture this: you followed the recipe exactly, watched the timer like a hawk, and opened the oven door with genuine excitement. But instead of the fluffy chocolate chip cookies you imagined, you’re staring at flat, crispy-edged puddles that merged into one giant cookie sheet. Or maybe it’s a banana bread that looks perfect on the outside but reveals a gummy, dense crumb when you slice into it. Sound familiar?
Here’s the thing most beginner bakers don’t realize—these failures almost never come from lack of talent. The most common baking mistakes beginners make trace back to a handful of predictable, fixable habits. Not all baking tools or ingredients are created equal, and choosing the right ones can make a big difference in avoiding these mistakes. I learned this the hard way back in 2015 when my first attempt at homemade cookies spread into something resembling a single, car-sized pancake. I was convinced I’d somehow ruined baking forever. Spoiler: I hadn’t, and neither have you.
This guide walks through the most common baking mistakes you’re likely making and gives you exact, practical fixes you can use in your very next batch. No fancy equipment required, no culinary degree needed—just a bit of understanding about why baking works the way it does.
Why Beginners Make So Many Baking Mistakes
Baking is closer to chemistry than casual cooking. When you’re making a stir-fry, you can throw in extra garlic, swap vegetables, or eyeball the soy sauce without disaster. Baking doesn’t offer that same forgiveness. Minor changes in oven temperature, ingredient ratios, or mixing time have big consequences because you’re relying on precise chemical reactions—leavening agents releasing gas, proteins forming networks, sugars caramelizing at specific temperatures. Substituting ingredients without understanding their function can also lead to unexpected results and is a common baking mistake. Even experienced bakers still make occasional mistakes when they rush or skip steps.
The rise of quick TikTok recipes and Instagram reels hasn’t helped. Beginners often copy 60-second videos without reading full instructions, missing crucial details buried in captions or completely omitted for time. This makes common baking errors more likely, not because you’re doing anything wrong, but because you’re working with incomplete information. The good news? Once you understand what’s actually going wrong, the fixes are surprisingly simple. Let’s walk through the specific beginner baking mistakes that trip up nearly everyone.
Mistake #1: Not Reading the Recipe All the Way Through
You’ve probably been there: you’re halfway through mixing a batch of cupcakes when you discover the butter was supposed to be softened for an hour, or the cookie dough needs to chill for two hours before baking. Suddenly your “quick afternoon project” has become an all-day commitment, and you’re tempted to skip the step entirely. This is where things go wrong.
Many beginner recipes for cookies, brownies, and cakes—especially those found online—hide crucial steps near the end or bury them in the middle of instructions. A recipe might casually mention “cool completely before frosting” after ten paragraphs, or note that your baking pan should be a specific size in passing. It’s important to carefully follow exactly what the recipe calls for, including each step, timing, and ingredient preparation, to avoid missing key details. When you jump straight to preheating the oven without planning, you set yourself up for timing disasters and ingredient mishaps.
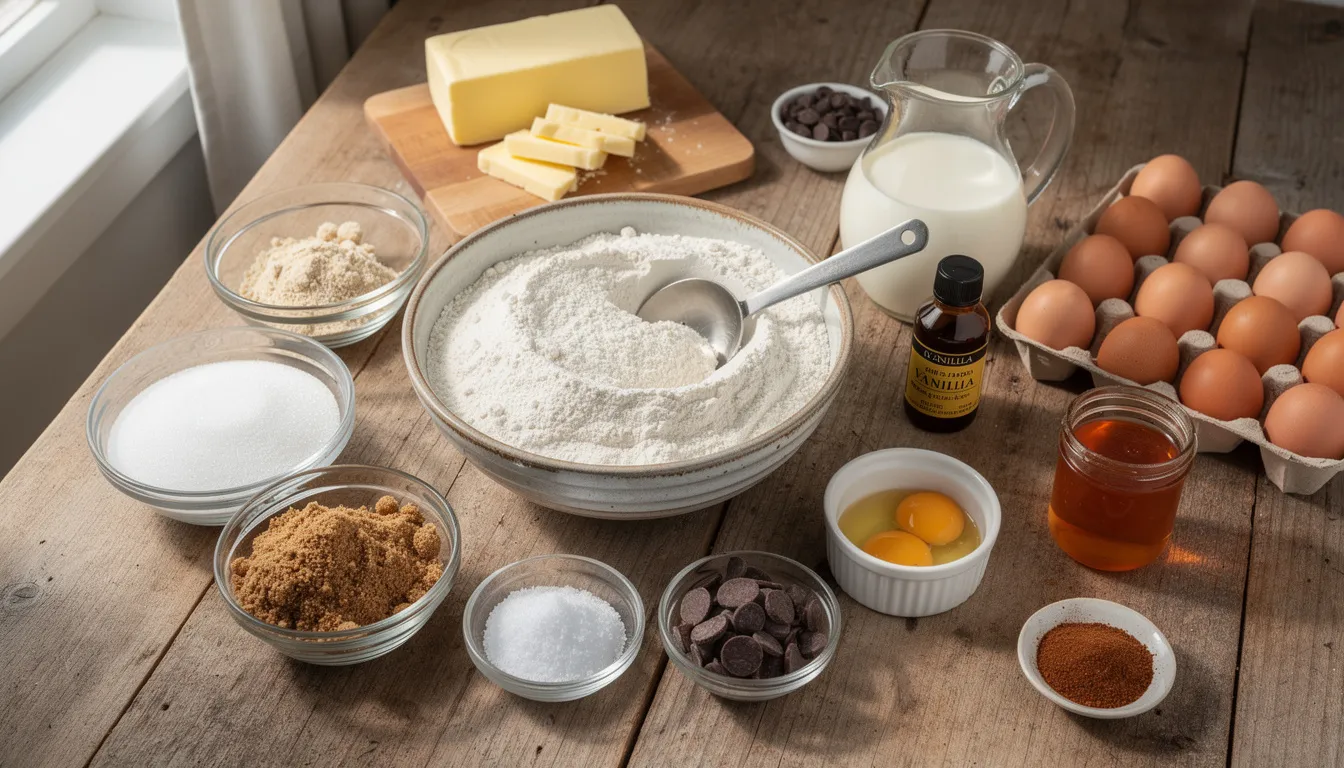
The fix is embarrassingly simple: read the full recipe once before you touch a single ingredient. Then skim it again quickly, noting anything time-sensitive. Professional kitchens call this “mise en place”—measuring flour, sugar, butter, eggs, vanilla extract, and leavening agents into separate bowls before starting. This prevents the mid-recipe panic of realizing you’re out of baking powder or your eggs are still ice-cold. Consider printing the recipe or using a tablet on a stand, and circle or highlight instructions like “room temperature eggs” or “chill dough 30 minutes” so they don’t sneak up on you.
Mistake #2: Measuring Ingredients Incorrectly
Imagine pulling a tray of chocolate chip cookies from the oven only to find they’re dry, crumbly, and taste like flour paste. Or brownies so greasy they leave puddles on the cooling rack. These disasters often trace back to one culprit: measuring ingredients wrong. Accurate measuring is essential for consistent and successful baking results, helping to prevent these common baking mistakes.
Here’s what happens when you scoop flour directly from a 5 lb bag with a measuring cup—you compact it. That single cup can hold 30-50% more flour than the recipe intended, turning moist batters dry and crumbly. The same applies to cocoa powder, powdered sugar, and other dry ingredients that settle and pack. This is one of the biggest baking mistakes beginners make with cakes, muffins, and quick breads, leading to what I call “hockey puck syndrome.”
There’s also confusion between tools. Dry measuring cups (the stackable metal or plastic ones you level off) aren’t interchangeable with liquid measuring jugs (the glass or plastic pitchers with pour spouts). Using a dry cup for milk or oil gives inaccurate readings, while scooping flour into a liquid measure packs it even more densely.
The “spoon and level” method helps: fluff your flour, spoon it gently into the measuring cup, and level with a knife. Sifting flour is another important step, as it ensures accurate measurement, breaks up lumps, and helps achieve the proper texture in your baked goods. But for truly consistent results, invest in a digital kitchen scale. Weighing ingredients in grams eliminates volume errors entirely—1 cup of flour should weigh about 120 grams, but scooped directly it often hits 150-170 grams. A decent scale costs under $20 and will transform your baking overnight. Pair it with proper metal measuring cups and measuring spoons for liquids and small quantities, and you’ve covered 90% of measurement issues.
Mistake #3: Using Ingredients at the Wrong Temperature
You’re ready to make a vanilla layer cake. The recipe says to cream butter and sugar until light and fluffy, so you pull a stick of cold butter straight from the fridge and start mixing. Five minutes later, you have lumpy batter with visible chunks, and the finished cake comes out dense enough to anchor a boat.
When recipes specify “room temperature butter,” they mean about 65-70°F (18-21°C). At this temperature, butter is soft enough to bend slightly when pressed but still holds its shape—not warm, not melting, not rock-hard. This matters because properly softened butter traps tiny air bubbles when creamed with sugar, and those bubbles expand during baking to create light, tender cakes. Butter that’s too cold can’t trap air efficiently, resulting in dense cake batter. Butter that’s too warm turns greasy, causing cookies spread into flat puddles.
Room temperature eggs matter too. Cold eggs can shock and curdle batters, especially when added to creamed butter-sugar mixtures. They also don’t emulsify as evenly, leading to uneven textures in your final bake.
The fix requires a bit of planning. Cut butter into small cubes to soften faster—this takes about 30 minutes at typical room temperature. For eggs, place them in a bowl of warm water (not hot) for 5-10 minutes. Make ingredient prep part of your routine: pull butter and eggs from the fridge 30-60 minutes before you plan to start mixing. Following ingredient temperature cues in recipes drastically reduces common baking errors with structure and texture.
Mistake #4: Overmixing or Undermixing Your Batter
Rubbery pancakes. Chewy, tough cupcakes. Muffins riddled with tunnels and holes. These are classic signs of overmixed batter, and it’s one of the sneakier baking mistakes because you’re technically doing exactly what the recipe says—just too enthusiastically.
Here’s the science in simple terms: mixing develops gluten in wheat flour. Gluten is the protein network that gives bread its chewy structure and helps dough rise properly. That’s great for a crusty loaf, but terrible for tender cakes, delicate muffins, and quick breads. The more you mix after adding flour, the more gluten develops, and the tougher your final product becomes.
Undermixing creates its own problems. You’ll see streaks of dry flour in banana bread, pockets of cocoa powder in brownies, or uneven textures where some bites are dense and others are airy. The baking process can’t fix what wasn’t properly combined.
The sweet spot: mix just until the flour disappears after adding dry ingredients. Stop earlier than you think you should. Use a silicone spatula at the end to gently fold any remaining streaks rather than continuing to beat with a hand mixer or stand mixer. Those tools are powerful, and even low speeds can overdevelop gluten quickly.
How do you know when batter is properly mixed? For cakes, it should look smooth and uniform but not overly glossy or stretchy. For muffin batters, a few small lumps are actually fine—don’t chase perfection. When the flour is incorporated and the batter has a consistent color, stop and step away from the mixing bowl.
Mistake #5: Oven Temperature Problems (Too Hot, Too Cold, or Unstable)
Your cupcakes dome dramatically and crack on top. Your brownies emerge burnt at the edges but suspiciously jiggly in the center. Your cookies take 20 minutes instead of the 10 the recipe promised. What’s going on?
Many home ovens—especially older electric or gas models—run 25-50°F off from the temperature displayed on the dial. Your oven might say 350°F while actually sitting at 375°F, which is enough to burn cookie bottoms and overdevelop browning before interiors set. This hidden calibration issue is a major cause of beginner baking mistakes that gets blamed on recipes or technique.
Not preheating long enough compounds the problem. Most bakers wait until the oven beeps and immediately slide in their baking sheets, but ovens need 15-20 minutes of preheating to stabilize fully. Starting too early means your bakes hit fluctuating temperatures during the critical first phase when structure sets.
Then there’s the door issue. Opening the oven door to “just check” on a cake drops the temperature 25-50°F instantly. When the oven door is opened, heat escapes rapidly, and this sudden loss of heat can negatively affect baking results. Cold air rushes in, steam escapes, and that careful rise you’ve been building collapses. Cakes sink in the center, cookies spread deflate, and baking time extends unpredictably.
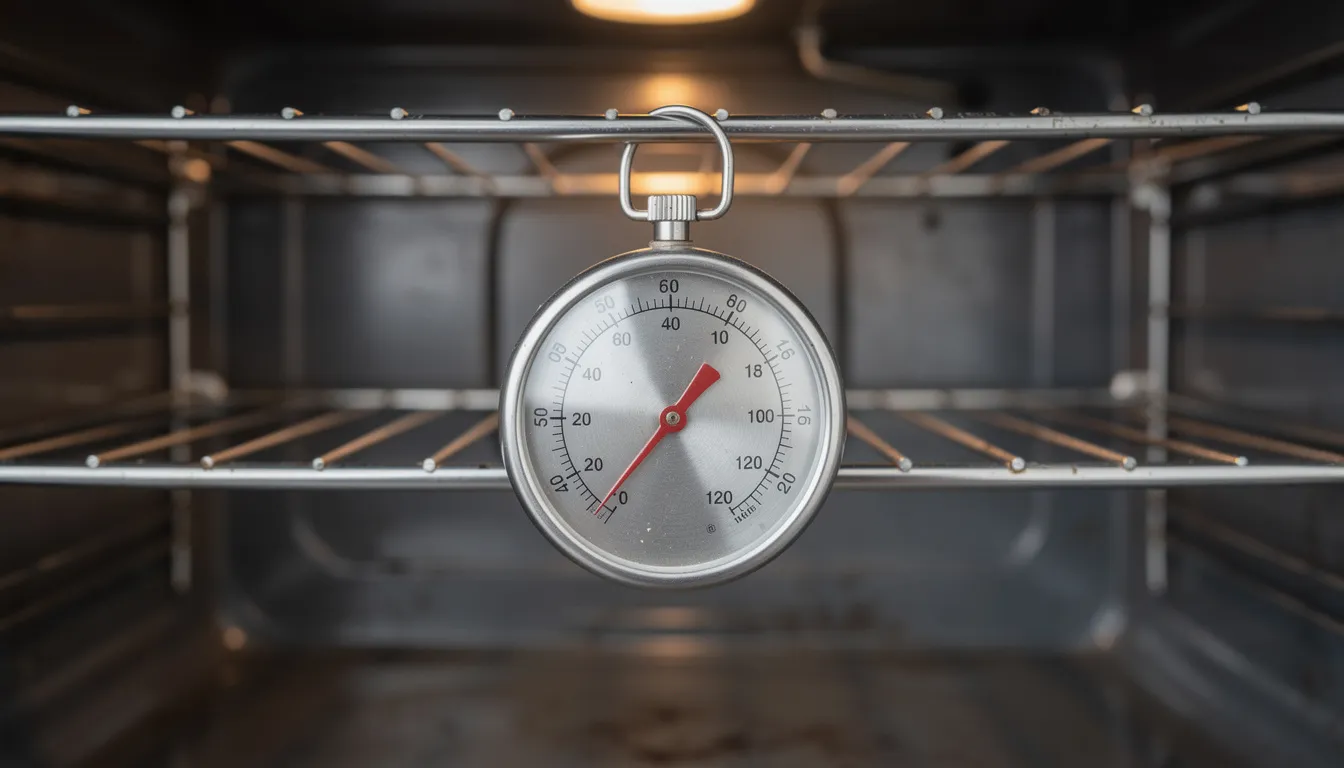
The fixes are straightforward. First, buy an inexpensive oven thermometer (under $10) and place it on the center rack. This tells you what the actual oven temp is versus what the dial claims. Second, preheat for a full 15-20 minutes before putting anything inside. Third, resist the urge to peek—use the oven light and window to monitor progress during the first two-thirds of baking time. When it’s finally safe to check, open the door briefly, test with a toothpick if needed, and close it quickly. Bake on the middle rack for even heat distribution, and avoid overcrowding multiple pans, which blocks airflow and creates hot spots.
Oven Preparation: Setting Yourself Up for Success
Before you even mix your first ingredient, take a moment to set your oven up for baking success. Many common baking mistakes can be traced back to oven temperature issues, so investing in an oven thermometer is a smart move. Even if your oven claims to be at 350°F, it might actually be running hotter or cooler, which can affect the texture and doneness of your baked goods. Always preheat your oven fully to the temperature your recipe calls for, and give it a few extra minutes to stabilize. During the baking process, resist the urge to keep opening the oven door—every time you do, heat escapes and can cause your cakes or cookies to bake unevenly. Instead, use the oven light to check on your treats without disrupting the oven temperature. These simple steps will help ensure your baked goods bake evenly and come out just right.
Mistake #6: Using the Wrong Pan (Size, Material, or Prep)
You find a gorgeous layer cake recipe calling for two 9-inch round pans. You only own an 8-inch pan, so you pour all the cake batter into that single smaller pan and hope for the best. Forty-five minutes later, you have an underbaked swamp in the center surrounded by burnt, crunchy edges. The pan size mattered more than you thought.
Pan size changes batter depth, which changes everything about baking time and texture. A recipe calibrated for thin layers in two pans won’t work when all that batter is piled into one deep vessel. The outside overcooks while the inside never reaches the temperature needed to set properly. This is a common cause of beginner baking mistakes in brownies, snack cakes, and anything baked in a 9×13-inch dish.
Pan material matters too. Dark nonstick pans absorb more heat, browning (or burning) bottoms and edges faster than light aluminum pans. Glass baking dishes conduct heat slowly, often requiring 25°F lower temperatures or extended cooking time. Shiny, light-colored metal reflects heat more evenly and gives the most predictable results for most baking projects. Using the right pan and proper temperature control is especially important for achieving a flaky or crisp pie crust, as both factors influence the texture and appearance of the finished crust.
Skipping pan prep is another quiet disaster. Not greasing properly, forgetting parchment paper, or relying solely on cooking spray for sticky batters leads to cakes that tear apart when you try to remove them. For most cakes and sticky bakes, grease the pan, line the bottom with parchment, then grease the parchment. It takes 60 seconds and saves genuine heartbreak.
Simple rules to follow: use the pan size stated in the recipe whenever possible. If using dark pans, reduce your oven temp by 25°F. Always grease and line pans for cakes. For beginners, owning a 9×13-inch rectangular pan, a standard muffin tin, and two 8- or 9-inch round pans covers about 90% of recipes without needing a massive collection.
Having a comfortable rolling pin is also important for rolling out dough evenly, especially for pie crusts and pastries.
Mistake #7: Rushing Cooling, Slicing, and Storage
The timer beeps. Your brownies look perfect. You pull the baking pan from the oven, grab a knife, and cut into that 9×13-inch pan exactly five minutes later. The brownies collapse into a smeared, crumbly mess. What went wrong?
Baked goods continue to set as they cool. The baking process doesn’t end when you remove something from the oven—residual heat keeps working, proteins finish firming up, and starches solidify into their final structure. Rushing this step is one of the quiet but common baking mistakes beginners make, especially when impatience wins over wisdom.
Different items need different approaches. Cookies should rest on the baking sheets for 2-3 minutes after leaving the oven (they’re still cooking from residual heat), then transfer to a wire cooling rack to prevent soggy bottoms. Cakes should stay in their pans for 10-15 minutes before turning out onto a rack to cool completely. Bread and quick breads need to cool almost entirely before slicing, or the interior will be gummy and compress under the knife. That loaf of cinnamon rolls needs patience before you pull it apart.
Storage mistakes follow quickly behind. Covering warm cakes tightly traps steam, creating condensation that makes tops gummy and sticky. Leaving cookies uncovered overnight lets them dry out and turn stale. The general rule: let everything cool completely to room temperature before covering or storing. Keep cookies in airtight containers. Wrap unfrosted cakes tightly in plastic wrap. Store anything with fresh fruit or dairy in the refrigerator, but bring it back to room temperature before serving for best texture.
Baking Cookies: Common Pitfalls and How to Fix Them
Baking cookies should be one of the most rewarding baking projects, but even experienced bakers know that a few small missteps can turn your dough dreams into disappointment. One of the most common baking mistakes is overmixing the dough—once you add the dry ingredients, mix just until everything comes together. Overworking the dough develops too much gluten, leading to cookies that are tough instead of tender.
Another frequent issue is using butter at the wrong temperature. Room temperature butter is absolutely essential for baking cookies with the perfect texture. If your butter is too cold, it won’t cream properly with the sugar, resulting in dense, heavy cookies. Too warm, and your dough will be greasy, causing the cookies to spread too much in the oven. For best results, let your butter sit out for about 30 minutes before you start baking—when pressed, it should yield slightly but not be melty.
The type of sugar you use also plays a big role. While white granulated sugar gives cookies crisp edges, brown sugar adds moisture and chewiness. Many classic chocolate chip cookie recipes use a mix of both for balanced flavor and texture. Just be careful not to overdo the brown sugar, or your cookies may spread more than you’d like.
Finally, keep a close eye on your baking time. Cookies continue to bake from residual heat even after you pull them from the oven, so take them out when they’re just set and lightly golden around the edges. Let them cool on the baking sheet for a couple of minutes before transferring to a rack. With these baking tips, you’ll avoid the most common cookie pitfalls and enjoy perfect results every time.
Baking Cakes and Muffins: Mistakes to Avoid for Perfect Results
When it comes to baking cakes and muffins, precision is your best friend. One of the most common baking mistakes is ignoring the pan size specified in the recipe. Using a pan that’s too small can cause batter to overflow, while a pan that’s too large can leave you with flat, dry cakes. Always check your recipe and use the recommended pan size for the best rise and texture.
Another key to success is making sure your oven is at the right temperature. Even a small difference can affect how your cakes and muffins bake—too hot, and they’ll dome and crack; too cool, and they’ll be dense or undercooked. An oven thermometer is an essential baking tool for verifying your oven’s true temperature, so you can trust that your baked goods will turn out as intended.
Flour choice matters, too. Cake flour is ideal for light, tender cakes, while all-purpose flour works well for denser cakes and muffins. Using the wrong type can change the crumb and structure of your bake. And don’t forget: overmixing the batter is a surefire way to end up with a dense cake or tough muffins. Mix just until the ingredients are combined, then stop—your mixing bowl should never see more action than necessary.
By paying attention to pan size, oven temperature, flour type, and mixing technique, you’ll avoid the most common baking mistakes and set yourself up for cake and muffin success.
Avoiding Dry or Tough Baked Goods
There’s nothing more disappointing than biting into a dry muffin or a dense cake. One of the most common baking mistakes is ending up with baked goods that are tough or crumbly, but a few simple habits can help you avoid this fate. Start by measuring your ingredients carefully—using a digital kitchen scale or proper measuring cups and spoons ensures you’re not adding too much flour or too little butter. Room temperature butter and eggs are also crucial for creating a smooth, even batter that bakes up moist and tender. And remember, when it comes to mixing, less is often more. Overmixing can develop the gluten in your flour, leading to a dense cake or chewy cookies. By paying attention to these details, you’ll sidestep the most common baking mistakes and enjoy soft, delicious baked goods every time.
Advanced Baking Techniques: When You’re Ready to Level Up
Once you’ve mastered the basics and feel comfortable with your go-to recipes, it’s time to explore more advanced baking techniques. This might mean trying your hand at intricate pastry designs, experimenting with new flavor combinations, or perfecting your cake decorating skills. Investing in essential baking tools like a pastry cutter for flaky pie crusts, a kitchen scale for precise measurements, and a food processor for blending doughs or making nut flours can elevate your baking process and open up a world of possibilities. These tools not only help you create more complex baked goods, but they also make the baking process smoother and more enjoyable. As you expand your baking repertoire, you’ll discover new techniques and tricks that will make you an even more confident and creative baker.
Staying Organized in the Kitchen
A little organization goes a long way in the world of baking. Before you even preheat the oven, gather all your ingredients and essential baking tools—measuring cups, spoons, mixing bowls, and spatulas—so you’re not scrambling mid-recipe. Measure out your flour, sugar, and other ingredients ahead of time and set them out in the order you’ll use them. This “mise en place” approach helps prevent missed steps and ensures you don’t accidentally double up on baking soda or forget the vanilla extract.
Using a recipe card or a kitchen app can help you keep track of each step. Check off ingredients as you go, and set timers for each stage of the baking process to avoid overbaking your goods. Cleaning as you go is another pro tip—wash utensils and wipe down surfaces as soon as you’re done with them, so flour and sugar don’t pile up and create chaos.
Once your baked goods are finished, label and date any leftovers before storing them in airtight containers. This keeps everything fresh and makes it easy to track what you’ve baked. Staying organized not only makes baking more enjoyable, but it also helps you avoid the most common baking mistakes and ensures your kitchen runs smoothly from start to finish.
The Importance of Practice
No one becomes a master baker overnight. The secret to baking success is simple: practice. Every batch of cookies, loaf of bread, or layer cake is an opportunity to learn and improve. Don’t be discouraged by the occasional baking mistake—each one is a valuable lesson that brings you closer to becoming a better baker. Try new recipes, experiment with different ingredients, and challenge yourself with new techniques and tools. With every baking project, you’ll gain more confidence and skill, and soon you’ll be creating baked goods that look and taste amazing. Remember, even the most experienced bakers started as beginners. So keep baking, keep learning, and most importantly, enjoy the process. Happy baking!
Baked Goods and Presentation: Making Your Creations Shine
You’ve put in the work—now it’s time to let your baked goods shine! Presentation is the finishing touch that can turn a simple treat into a showstopper. Start by choosing the right packaging: decorative tins, glass jars, or festive bags add a special touch, whether you’re gifting or just storing your creations.
A dusting of powdered sugar or a drizzle of chocolate can instantly elevate the look of cakes, cookies, and quick breads. For a professional finish, use a mini offset spatula to smooth out frosting or add decorative swirls. Don’t be afraid to get creative—try arranging mini muffins or cake pops in fun patterns, or add a sprig of fresh mint or rosemary for a pop of color and fragrance.
Remember, the way you present your baked goods is almost as important as the baking itself. With a little attention to detail and a dash of creativity, your treats will look as good as they taste—making every baking project a feast for the eyes as well as the palate.
Bonus: Easy Tools That Make Fewer Mistakes Inevitable
Technique matters most, but a few basic tools can drastically reduce beginner baking mistakes by removing guesswork from the equation.
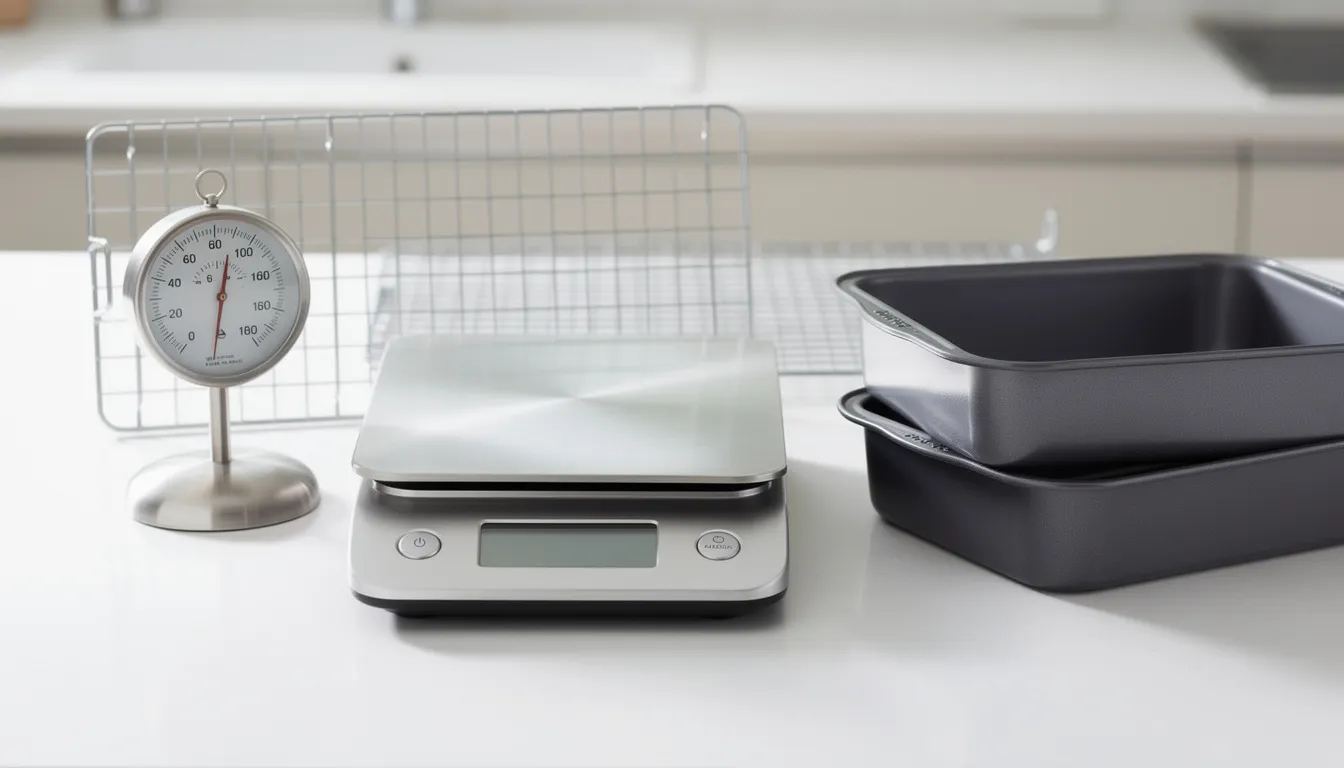
A digital kitchen scale eliminates the measurement errors that cause dry, dense cakes and crumbly cookies—no more wondering if you packed the flour too tightly. An oven thermometer shows you what your oven is actually doing, not what the dial claims, solving temperature mysteries instantly. A set of sturdy metal measuring cups and measuring spoons handles liquids and small quantities precisely. A silicone spatula lets you fold batters gently without overdeveloping gluten, and it’s heat resistant enough for stovetop work. A pastry cutter (also called a dough blender) is essential for cutting cold butter into flour, which is key for making flaky biscuits, scones, and pie crusts. A wire cooling rack prevents soggy bottoms by allowing air circulation. A cookie scoop helps portion dough evenly for uniform cookies and can be used for other kitchen tasks like scooping muffin batter or portioning meatballs. And quality light-colored baking pans—aluminum rather than dark nonstick—give you consistent, even browning across most baking projects. A food processor is also extremely useful for making dough, blending ingredients, or preparing special flours, making many baking tasks faster and more efficient.
You don’t need to buy everything at once. If you’re picking just one or two items to start, grab a kitchen scale and an oven thermometer. These two essential baking tools address the mistakes that cause the most failures for the lowest investment. An instant read thermometer is also invaluable for checking the temperature of liquids when working with yeast or ensuring dough rises in the ideal environment. Everything else can come later as your baking expands.
Conclusion: Turning Baking Mistakes into Future Success
Most common baking mistakes beginners make come from a handful of fixable habits: not reading the recipe fully, measuring ingredients carelessly, ignoring temperature cues, overmixing batter, misunderstanding your oven, choosing the wrong baking pan, and rushing the cooling process. None of these require talent to fix—just awareness and a bit of patience. Every great home baker has burned cookies, produced a dense cake, and pulled tough muffins from the oven. Mistakes are part of the learning curve, not evidence that you’re bad at this.
Pick one or two improvements from this guide for your very next recipe. Maybe you’ll finally measure flour by weight, or maybe you’ll invest in that $8 oven thermometer and discover your oven runs 30 degrees hot. Small changes compound into dramatically better baker results over time.
Which baking mistake do you recognize most from your own kitchen? Share your story in the comments—I’d love to hear which fix you’re trying first. Happy baking!